
Here is a truth most tech guides won’t tell you upfront: cleaning your temp files is not going to fix a slow Windows 11 PC.
Neither is running a “registry optimizer.” Or defragmenting your SSD. Or switching to dark mode.
If your PC boots slowly, stutters through File Explorer, or randomly spikes to 90% CPU while you’re doing absolutely nothing, those surface-level tricks are just noise. The real problem runs deeper. And fixing it the right way? That is what this guide is all about.
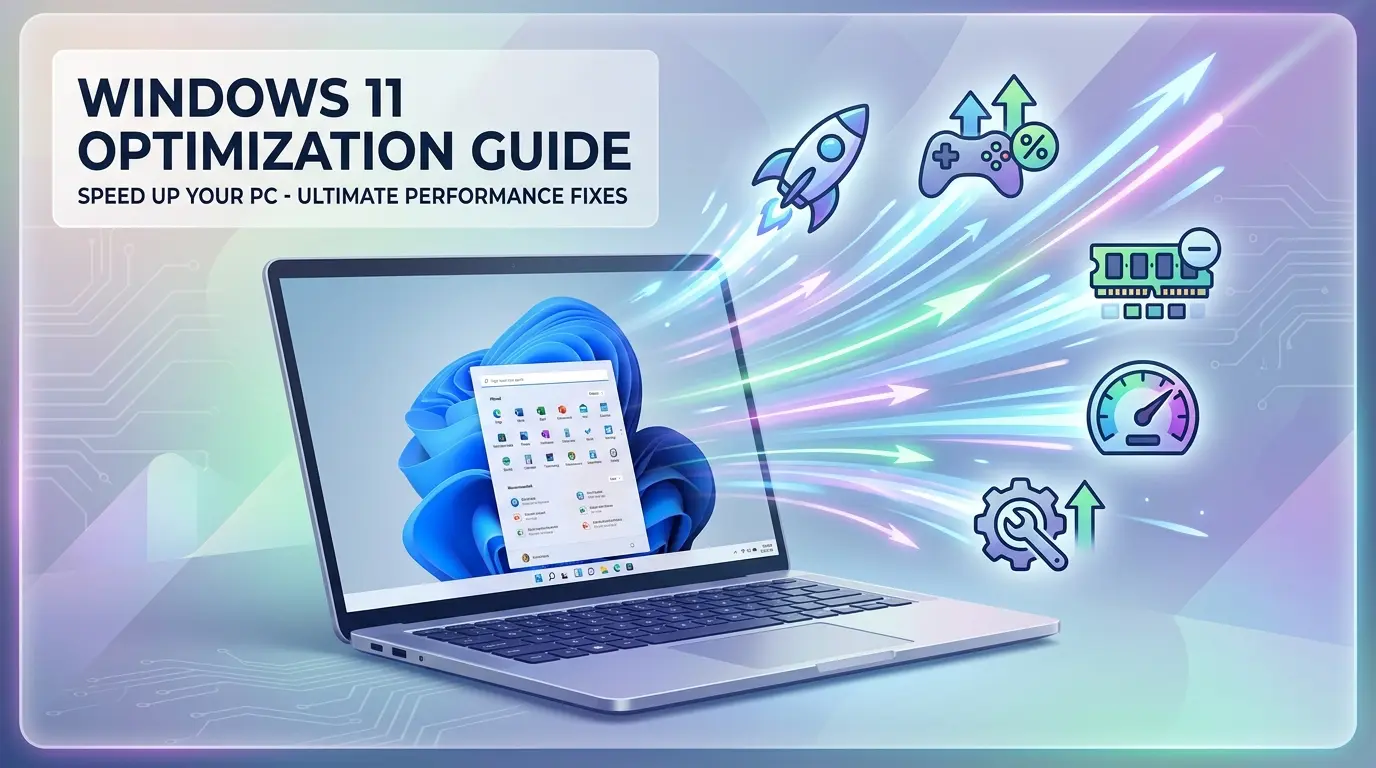
Windows 11 in 2026 is genuinely impressive in many ways. The hybrid-core scheduling is smarter, the AI integrations are more useful, and the upcoming 25H2 update is built specifically around speed and responsiveness. But right out of the box, Windows 11 arrives loaded with telemetry services, background processes, AI listeners, unnecessary visual layers, and startup programs you never asked for. All of that adds up fast, especially on systems with 8GB or 16GB of RAM.
Here is what is wild: Microsoft’s own data confirms that Windows 11 can use over 6 GB of RAM at idle on an 8 GB system, even with no apps open. On a 16 GB system, idle RAM usage often exceeds 10 GB. That leaves very little room for the things you actually want to do.

So whether you are a gamer chasing higher FPS, a professional fighting background lag during video calls, or just someone who wants their PC to feel fast and responsive again, this guide has you covered.
You will learn how to diagnose the real cause of your slowdown, apply the highest-impact fixes first, avoid the tweaks that can break things, and tune Windows 11 specifically for your workload. No fluff. No placebo tips. Let’s get into it.
Why Windows 11 Feels Slow: The Diagnosis Nobody Talks About
Most optimization guides hand you a checklist. This one starts with a question: what is actually causing your slowdown?
That matters because the fix for a slow boot is completely different from the fix for laggy File Explorer. And the fix for gaming stutters is nothing like the fix for high CPU usage at idle. Applying the wrong solution wastes your time and can even make things worse.
What is “background kernel noise”? In Windows 11, background kernel noise refers to the combined overhead of services, telemetry processes, AI listeners, hardware polling routines, and idle maintenance tasks that consume CPU cycles, RAM, and disk I/O even when you are not actively using the machine. On a factory-fresh Windows 11 system, there can be over 100 active background services running at any given moment, most of which you will never notice or need.
The good news is that these sources of noise follow patterns. And once you understand the pattern, you can target the fix precisely.
The Four-Layer Windows 11 Tune-Up Framework
Think of Windows 11 performance in four layers. Each layer has its own causes, symptoms, and solutions. Fixing the wrong layer wastes your time. Starting at Layer 1 and working down gives you the highest return for your effort.
Start at Layer 1. Fix what you find. Then move to the next. This is the smarter path, and it is the one most optimization articles completely skip.
Layer 1: Eliminate Boot Bloat and Background Load
This is where most people get the biggest wins, fastest. And the best part? You do not need to touch the registry or run any scripts. Everything here is built right into Windows.
How to Disable Startup Apps in Windows 11 (Step-by-Step)
Startup apps are the single biggest cause of slow boot times. Every app that launches automatically at startup steals CPU time, eats RAM, and competes for disk access before you have even opened anything you actually want. Spotify, OneDrive, Xbox services, Teams, Steam, none of these need to load the second your PC turns on.
Here is how to clean them up:
- Press Ctrl + Shift + Esc to open Task Manager directly.
- Click Startup apps in the left sidebar.
- Click the Status column header to sort by Enabled/Disabled.
- Look at each enabled app and ask: do I need this running before I open anything?
- Right-click any unnecessary app and select Disable.

Be ruthless here. Spotify can open when you click it. So can Steam. So can Discord. The only things that genuinely need startup access are your antivirus and GPU control panel software.
A common pattern on fresh systems: 12 to 18 startup apps enabled by default, of which 2 or 3 are actually necessary. Disabling the rest can cut your boot time by 20 to 40 seconds on an average system.
Tip: Do not delete startup entries, just disable them. That way you can re-enable anything if something stops working the way you expect.
Background App Permissions: The Hidden RAM Drain
Windows 11 lets individual apps run in the background even when you are not using them. Weather, Mail, Calendar, Widgets, News, they all consume RAM and occasionally wake up your CPU to refresh their data. You can turn this off app by app.
Go to Settings → Apps → Installed Apps, click the three-dot menu on any app, choose Advanced options, then set Background app permissions to Never. Repeat this for apps you rarely open, especially Mail, Calendar, Weather, and any pre-installed games. On a typical system, this alone can free 200 to 500 MB of RAM.

Key Takeaway for Layer 1: Startup apps and background permissions are your biggest, safest wins. Do these before anything else. The time investment is under ten minutes and the impact is immediate.
Layer 2: UI Responsiveness and Visual Overhead
Here is something most guides get wrong: they tell you to disable all visual effects as if that will magically transform your PC. On a modern GPU, it barely moves the needle for raw performance. But it does reduce the visual processing load on older or integrated graphics, and more importantly, it eliminates animation delays that make the OS feel sluggish even when the hardware is fine.
How to Adjust Visual Effects for Best Performance (Step-by-Step)
- Press Win + R, type sysdm.cpl, and press Enter.
- Click the Advanced tab.
- Under the Performance section, click Settings.
- Select Adjust for best performance to disable everything.
- Then manually re-check these three to keep things readable:
- Smooth edges of screen fonts
- Show shadows under mouse pointer
- Show thumbnails instead of icons
- Click Apply, then OK.

This approach strips out the animation overhead while keeping the interface visually clean. The result: menus open faster, windows respond instantly, and the whole system feels snappier, especially on older hardware or when running with a discrete GPU under load.
Transparency Effects: A Small Win Worth Taking
Windows 11’s frosted-glass transparency looks nice. But it requires constant GPU recalculation. Go to Settings → Personalization → Colors and toggle off Transparency effects. On lower-end systems or when gaming in windowed mode, this reduces the GPU overhead of the Desktop Window Manager (DWM), the process that renders your entire UI using the graphics card.

Similarly, go to Settings → Accessibility → Visual Effects and turn off Animation effects. This removes the sliding and fading transitions that add 150 to 300 milliseconds to every window interaction. Those fractions of a second add up across an entire day.

Disabling visual effects is often recommended as a top priority — but on any system with a dedicated GPU made after 2018, the raw performance gain is minimal. The real value is in reducing perceived latency. Menus feel faster not because your CPU is faster, but because there is no 200ms fade animation in the way.
Key Takeaway for Layer 2: Animations create perceived slowness even on fast hardware. Disabling them is a UI responsiveness fix, not a benchmark fix. Know the difference.
Layer 3: Storage, Updates, and Device Health
Storage health has a bigger impact on Windows 11 performance than most people realize. A nearly-full SSD, uncontrolled update behavior, and fragmented or outdated drivers can all make an otherwise fast machine feel like it is running through mud.
Enable Storage Sense and Clean Out Temp Files
Windows 11 accumulates junk fast: temporary installation files, cached update packages, crash dumps, and leftover app data. Over time, this can consume several gigabytes of your system drive and slow down read/write operations.
Enable Storage Sense: go to Settings → System → Storage, toggle on Storage Sense, and set it to run every week. It will automatically clear temporary files, old Windows Update packages, and recycle bin contents on a schedule.

For a manual deep clean, press Win + R, type temp and delete everything you can. Then type %temp% and do the same. Then type prefetch and clear that folder too. Skip any files that show an “in use” error, Windows handles those automatically.

Important: When using Disk Cleanup, never delete the DirectX Shader Cache. That cache stores pre-compiled shaders for games, and removing it causes games to stutter during gameplay while the shaders recompile. It looks like free space, but it is actually performance data.
The Paging File: Fix It Once and Forget It
Windows manages a pagefile on your system drive to handle memory overflow. By default, it resizes dynamically, which creates small but repeated write operations on your SSD. Setting a fixed size eliminates that overhead.
Go to System Properties → Advanced → Performance Settings → Advanced → Virtual Memory → Change. Uncheck “Automatically manage paging file size,” select your C: drive, choose Custom size, and set both Initial and Maximum to the same value, typically 10,240 MB for 16 GB RAM systems. Click Set, then OK.

Control When Windows Restarts After Updates
Few things are more frustrating than coming back to your desk to find Windows has rebooted itself mid-session. Go to Settings → Windows Update → Advanced options and turn on Notify me when a restart is required. This puts you in control of when the reboot happens, not Microsoft.

As Microsoft’s official Windows Update guidance explains, you can also set Active Hours to ensure updates never force a restart during your working window.
Key Takeaway for Layer 3: Storage and update behavior are slow-building problems. They rarely cause dramatic slowdowns overnight, but they erode performance steadily over months. Clean storage and controlled updates keep the baseline healthy.
Layer 4: Workload-Specific Tuning for Gaming, Work, and Creative Tasks
Generic optimization advice treats every PC the same. That is a mistake. A gaming rig, a business laptop, and a creative workstation all have different bottlenecks, and the best settings for one can actively hurt the others.
For Gamers: Power Plans, HAGS, and Game Mode
The first move for any gaming setup is switching to the Ultimate Performance power plan. The default Balanced plan introduces CPU latency during sudden load spikes, the processor waits to see if the heavy workload is going to stick before boosting frequency. In a fast-paced game, that reactionary delay causes micro-stutters and frame drops.
Enable Ultimate Performance by opening PowerShell as administrator and running this command:
powercfg -duplicatescheme e9a42b02-d5df-448d-aa00-03f14749eb61Then go to Control Panel → Power Options and select the Ultimate Performance plan from the list. It eliminates core parking and keeps the processor at maximum boost frequency at all times.

The tradeoff? Higher power draw and more heat. On laptops or systems with limited cooling, this can cause thermal throttling that ironically makes performance worse than the Balanced plan. If you notice your fans screaming constantly, dial it back to High Performance instead.
Hardware-Accelerated GPU Scheduling (HAGS) is worth enabling if you have a modern GPU. It offloads GPU task scheduling from the CPU to the GPU’s dedicated hardware scheduler, reducing input latency and CPU overhead. Go to Settings → Display → Graphics → Change default graphics settings and toggle on Hardware-accelerated GPU scheduling. HAGS is also a requirement for NVIDIA’s DLSS 3 Frame Generation on RTX 40-series cards.

Game Mode (Settings → Gaming → Game Mode) is worth keeping on. It reduces background Windows Update activity and notification interruptions during gaming sessions. It does not deliver dramatic FPS improvements, but it makes the gaming experience more stable and predictable.

For Professionals and Business Users: Stability Over Raw Speed
Business users often need predictability more than peak performance. The most impactful changes here are:
- Disable unnecessary startup apps (especially Teams, OneDrive, and browser helpers if not needed immediately on boot)
- Set background app permissions to Never for apps used only occasionally
- Configure Active Hours in Windows Update to prevent restarts during work hours
- Turn off notifications from non-essential apps during focus periods (Settings → System → Notifications)
- Disable search indexing for folders that contain large project files you access through direct paths rather than search

As Pureinfotech’s Windows 11 performance guide notes, one of the most overlooked professional optimizations is controlling how Windows handles background sync, particularly OneDrive and cloud-backed libraries that can saturate disk I/O during active work.
For Creators: RAM, Storage Throughput, and Render Priority
Creative workloads, video editing, 3D rendering, audio production, are typically RAM- and storage-bound rather than CPU-bound. The biggest wins here come from:
- Fixing the paging file to a static size on your fastest NVMe drive
- Disabling unnecessary services that consume RAM during idle (SysMain / Superfetch is a good candidate, it pre-loads apps into RAM based on your usage patterns, which sounds helpful but creates disk I/O competition during render tasks)
- Setting your creative application to High priority in Task Manager during active renders
- Ensuring your GPU drivers are clean-installed directly from NVIDIA, AMD, or Intel, not through Windows Update, which often lags several months behind the latest release

The BIOS Foundation: Where Real Performance Lives
Here is something that surprises a lot of people: a significant chunk of your performance potential is locked away in your BIOS, and Windows cannot access it until you go in and unlock it yourself.

Enable XMP or EXPO for Your RAM
Most motherboards default to JEDEC standard RAM speeds. For DDR4, that is 2133 MHz. For DDR5, it is 4800 MHz. If your RAM is rated for 3200 MHz, 6000 MHz, or higher, you are leaving performance on the table until you enable the right profile.
In your BIOS (press Del or F2 at startup), look for XMP (Intel) or EXPO (AMD). Enable it, save, and restart. Your RAM will now run at its advertised speed. In CPU-bound games like Valorant or CS2, this alone can improve average FPS by 5 to 15 percent. According to Tom’s Hardware’s benchmark analysis of memory frequency scaling, memory latency is one of the most consistent bottlenecks in competitive gaming workloads.
Enable Resizable BAR and Above 4G Decoding
Resizable BAR (Base Address Register) allows your CPU to access the entire GPU VRAM buffer at once instead of in 256 MB chunks. This reduces texture streaming delays and improves minimum frame rates. Enable both Resizable BARand Above 4G Decoding in your BIOS. Your motherboard must support UEFI mode (not Legacy/CSM) for this to work. When enabled correctly, expect 3 to 10 percent FPS improvement in GPU-bound scenarios.
The VBS Performance Paradox: Security vs Speed
This is the one setting that generates the most debate in the optimization community, and for good reason.
What is Virtualization-Based Security (VBS)?
VBS is a Windows 11 security feature that uses hardware virtualization to create a protected memory region invisible to the rest of the operating system. It prevents kernel-level exploits and malware from tampering with core system processes. Its companion feature, Hypervisor-Protected Code Integrity (HVCI), validates all kernel code against this secure environment before execution.
The performance cost is real. Independent testing by Tom’s Hardware showed that VBS and HVCI can reduce gaming performance by 3 to 6 percent on modern CPUs with Mode-Based Execution Control (MBEC) hardware. On older processors without MBEC support, the penalty can reach 25 percent, a massive hit that effectively drops a mid-range system into low-end territory.
For a dedicated gaming PC that is protected by hardware firewalls, safe browsing habits, and no sensitive data, disabling Memory Integrity is widely considered the highest-impact single toggle for gaming performance. Go to Windows Security → Device Security → Core Isolation → Memory Integrity and toggle it off. A restart is required.

For a business laptop, shared family PC, or any machine with sensitive data, leave VBS on. The security benefit is worth more than the performance gain.
After disabling Memory Integrity, Windows Security will show a warning flag. This is expected and not a system error. But do not disable VBS on machines that handle financial data, medical records, or corporate credentials. The protection it offers against firmware-level attacks is not worth sacrificing for a few extra FPS.
Key Takeaway for VBS: This is a deliberate tradeoff, not a straightforward optimization. Know what you are trading away before you make the call.
Telemetry, Privacy, and Reclaiming Your CPU
Windows 11 is, without exaggeration, the most telemetry-heavy version of Windows ever released. Processes like DiagTrack (Connected User Experiences and Telemetry), CompatTelRunner, and various scheduled tasks run in the background collecting usage data, diagnostic logs, and advertising identifiers. They consume CPU cycles and network bandwidth you never see.
The standard privacy toggles in Settings reduce “Optional” data but leave “Required” telemetry running. For a more complete solution, apply a policy-level cap through the registry:
HKEY_LOCAL_MACHINE\SOFTWARE\Policies\Microsoft\Windows\DataCollectionOnce applied, the telemetry option in Settings will appear grayed out with a note indicating the policy is active. On Pro and Enterprise editions, this is highly effective. On Home edition, it reduces telemetry to the minimum required for security updates.
Removing the Widgets Panel and Copilot
The Widgets panel pushes MSN News and ads directly to your taskbar and keeps a background process (Widgets.exe) consuming close to 100 MB of RAM even when hidden. Right-click the taskbar, go to Taskbar settings, and toggle off Widgets.
To fully remove the WebExperience pack that powers Widgets, open PowerShell as administrator and run:
# Remove the Widgets (WebExperience) panel completely Get-AppxPackage *WebExperience* | Remove-AppxPackage
Remove Copilot
Get-AppxPackage Microsoft.Copilot | Remove-AppxPackage
Remove Bing Weather and News
Get-AppxPackage -AllUsers BingWeather | Remove-AppxPackage -AllUsers Get-AppxPackage -AllUsers BingNews | Remove-AppxPackage -AllUsersAlso go to Settings → Privacy & Security → Diagnostics & feedback and turn off Tailored experiences. And under Settings → System → Notifications, uncheck “Get tips and suggestions when using Windows.” These two alone stop a surprising amount of background chatter.

Key Takeaway for Telemetry: Disabling telemetry is not just a privacy win, it is a real performance improvement. Fewer background wake events mean more CPU headroom for the things you actually care about.
Windows 11 25H2: The Speed Update You Are Already Waiting For
The upcoming 25H2 update, internally known as Windows K2, represents a genuine shift in Microsoft’s priorities. For years, each new Windows update brought more AI features, more cloud integrations, and more background services. The K2 effort is different: it is focused specifically on eliminating the UI sluggishness that has frustrated users since Windows 11 launched.

The headline feature is the Low Latency Profile. When you click the Start button, open a folder in File Explorer, or right-click the desktop, Windows will send a high-priority interrupt that ramps the CPU to maximum boost frequency for one to three seconds.
Preliminary benchmarks suggest this makes app launches 40 percent faster and context menu responsiveness up to 70 percent snappier. This is borrowed directly from macOS, which has used aggressive power-state ramping for UI responsiveness for years.
The 25H2 scheduler also improves hybrid-core handling, more aggressively parking P-cores during idle and routing background maintenance tasks to E-cores. This is expected to deliver around 5 percent better battery life on laptops without any perceptible impact on peak performance.
For IT departments, Quick Machine Recovery (QMR) is a major quality-of-life addition. If Windows detects repeated boot failures, it can automatically enter recovery mode, connect to the internet, and pull a targeted fix from Microsoft, without requiring manual re-imaging. That is a massive reduction in support burden for managed fleets.
Tip: Even before 25H2 arrives, you can install preview builds through the Windows Insider Program under Settings → Windows Update → Windows Insider Program. The Dev channel carries the most cutting-edge features, while the Beta channel offers a more stable preview.
Common Mistakes That Actually Make Windows 11 Slower

This is the section that saves you from wasted hours. Here are the most common “optimizations” that either do nothing or actively hurt your system:
Running a registry cleaner
Modern Windows 11 does not suffer meaningfully from registry bloat. Third-party registry cleaners solve a problem that does not really exist, and they can remove legitimate entries, causing apps to crash or behave unexpectedly.
Defragmenting an SSD
SSDs do not need defragmentation. Windows 11 runs TRIM automatically to maintain SSD performance. Defragmenting a solid-state drive adds unnecessary write cycles and reduces the drive’s lifespan. If you open Defragment and Optimize Drives, Windows will show SSDs as needing “optimization”, that is a TRIM pass, not a defrag. Let it run on its own schedule.
Disabling Windows Defender to free up performance
Defender’s real-time protection uses minimal resources on modern hardware, and removing it leaves your system genuinely vulnerable. The performance gain is negligible; the security cost is real.
Blindly running debloat scripts
Third-party debloat scripts can remove useful dependencies, breaking Microsoft Store app updates, snapping certain driver update paths, or removing components that other apps depend on. Only use vetted, transparent scripts like Win11Debloat on GitHub, and always create a restore point first.
Disabling all Windows Updates
Critical security patches and CPU microcode fixes arrive through Windows Update. A system running months-old updates is not “optimized”, it is exposed. Use Active Hours and the notification setting to control timing instead.
Deleting the DirectX Shader Cache
This cache is what prevents in-game stutter during shader compilation. Clearing it does not free meaningful space, it just forces games to rebuild it, causing stutters the next time you play.
Safe vs Risky: Know Before You Tweak
RAM Reclaim Calculator: How Much Can You Free Up?
Not all optimizations free the same amount of memory. Use this calculator to estimate how much RAM you can reclaim by applying common Layer 1 and Layer 2 tweaks. The formula is based on average per-process memory footprints across a typical Windows 11 system.
Formula: Estimated RAM freed (MB) = (Startup apps disabled × 80 MB) + (Background apps restricted × 35 MB) + (Widgets removed × 100 MB) + (Copilot removed × 200 MB) + (Visual effects disabled × 50 MB)
Enter how many optimizations you plan to apply to estimate your RAM savings.
Community Tools Worth Trusting
Manual optimization covers most cases well. But if you want to go deeper without spending hours in the registry, a handful of vetted community tools are genuinely excellent.
Chris Titus Tech's WinUtil (CTT)
Chris Titus Tech's WinUtil (CTT) is the most widely trusted PowerShell-based optimization suite in the Windows enthusiast community. It consolidates hundreds of safe tweaks into a clean GUI. The Tweaks tab applies debloating, disables telemetry, and reduces active background services to around 70 to 80, down from the typical 100+ on a fresh install.
The Updates tab lets you delay Feature Updates by a year while still receiving security patches. It is regularly maintained, fully open-source, and reversible.
Wintoys
Wintoys is available directly from the Microsoft Store, which itself is a trust signal. It surfaces hidden settings (power plans, privacy toggles, startup controls, visual settings) in a clean, consumer-friendly interface without requiring any registry knowledge. For users who want the gains without the technical depth, Wintoys is an excellent starting point.
Win11Debloat on GitHub
Win11Debloat on GitHub is the go-to script for users who want granular control over which apps and services are removed. It includes full logging, restore point creation, and an undo function. Win11Debloat is openly maintained with transparent code and a detailed README explaining exactly what each option does.
Important: Always create a system restore point before running any debloat script. Go to Control Panel → System → System Protection → Create and save a restore point named "Before Debloat." If anything breaks, you can roll back in minutes.
How to Know If Your Tweaks Actually Worked
This is the step most people skip, and it is the one that separates real optimization from wishful thinking.
Before applying any changes, record your baseline. Open Task Manager and note your idle CPU, RAM, and disk usage. Use your stopwatch to time your boot from power button to usable desktop. Note your average FPS in a game you play regularly.
After applying each batch of changes, measure the same metrics again. The improvements you will actually care about are:
- Boot time: Seconds from power-on to desktop
- Idle RAM usage: GB used with no apps open
- 1% low FPS: The frame rate stability metric that determines smoothness
- Context menu response: How quickly right-clicking opens a menu
As Microsoft Learn's performance tuning documentation explains, measuring under consistent conditions, same time of day, same apps open, same network state, is essential for reliable before/after comparisons. One-off measurements are noise. Three consistent measurements are data.
Conclusion: Optimization Is Subtraction, Done Wisely
The best version of Windows 11 is not the one with the most features turned off. It is the one where the right things are off, the right things are on, and you actually know why.
That is the difference between real optimization and running a script and hoping for the best.
Start with your Layer 1 fixes, startup apps and background permissions. Those will give you more improvement per minute than anything else in this guide. Then work through UI overhead, storage health, and workload-specific tuning. Only go deeper into BIOS settings, VBS, and registry tweaks when you have exhausted the safe options and you understand the trade-offs.
Windows 11 is heading in a genuinely better direction. The 25H2 update brings real, Microsoft-built responsiveness improvements, the kind of latency reduction that used to require aggressive community tweaks. But even when those improvements arrive, the fundamental rule holds: a leaner system is a faster system. And you now have the map to get there.
Start with the 10-minute routine. Measure your results. Build confidence. Then go deeper.
Your PC is waiting.
Ready to unlock the full potential of your Windows 11 device? Start with the essentials, explore advanced tweaks as your confidence grows, and remember: optimization is a journey, not a one-time fix.
Have a specific Windows 11 slowdown that these fixes did not solve? Drop it in the comments, let's figure it out together.

")


[…] Read the Full Article → […]
[…] Read the Full Article → […]