
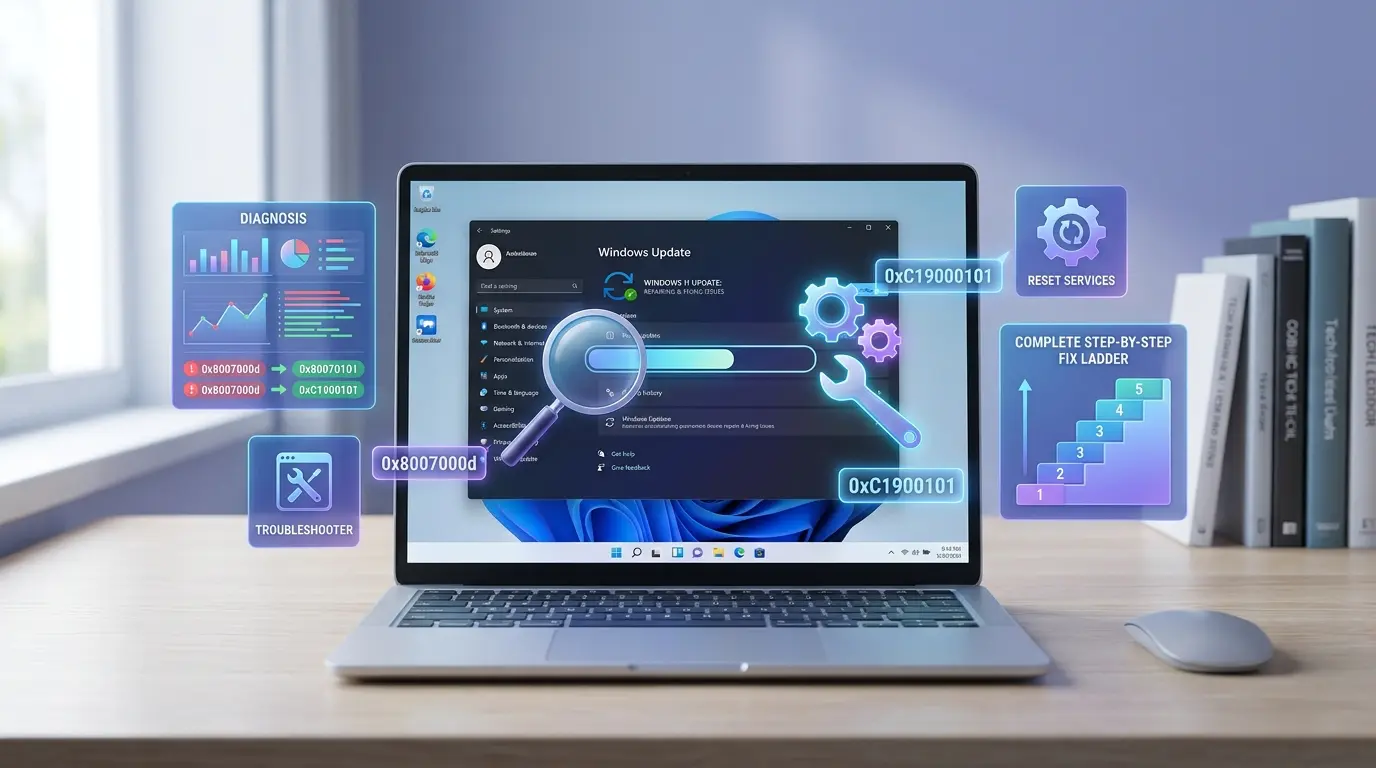
You open Settings, click “Check for updates,” and nothing happens. Or worse, the update downloads, reaches 27%, and freezes there for two hours. Or it installs, restarts your PC, and breaks your audio, your search bar, or your access to the C: drive entirely.
Sound familiar? You are not alone.
Windows 11 update failures are one of the most frustrating and commonly searched tech problems right now. And the worst part? Most guides online recycle the same five generic steps without explaining why an update is failing or which fix actually matches your problem.
This guide is different. Whether your update is stuck downloading, throwing a cryptic error code, blocking a feature upgrade, or crashing your PC after installation, you will find a clear, diagnostic-first approach here. We will walk through every major failure type, explain what is actually happening under the hood, and give you the right fix for your specific situation, without guesswork.
- How to identify which stage your update is failing at (offered, downloading, installing, or post-reboot)
- What common Windows Update error codes actually mean, and what to do about each one
- A step-by-step manual reset procedure that clears corrupted update components
- How to fix update failures on unsupported devices that lack TPM 2.0 or Secure Boot
- When to use SFC, DISM, SetupDiag, or a full in-place repair
- How to recover your PC when an update causes a boot failure or blue screen
- Common mistakes to avoid that make update problems worse
Step Zero: Diagnose Before You Fix
Here is the most important thing most guides skip entirely: not all Windows 11 update problems are the same.
")
Running DISM to repair system files makes perfect sense if your Component Store is corrupted. But if your device is under a Microsoft safeguard hold, meaning Microsoft has intentionally blocked the update on your specific hardware, no amount of SFC scanning or cache clearing will help. You would be wasting time chasing a problem that does not exist on your end.
Before you touch a single command, ask yourself which of these four stages is actually breaking down.
Stage 1: Update Not Offered
You check for updates and nothing appears, or Windows insists you are “up to date” when you know a newer version exists. This is often caused by a pause state, a rollout delay, an active safeguard hold, or a management policy.
Stage 2: Stuck Downloading
The update appears but stalls at a fixed percentage (0%, 27%, 40%, 100%) and never progresses. This usually points to a network issue, a corrupted download cache, or a broken Background Intelligent Transfer Service.
Stage 3: Failing During Installation
The update downloads fine but fails mid-install with an error code. This is where corrupted system files, driver conflicts, low storage, or service permission issues come into play.
Stage 4: Failing After Restart
The update installs, the PC reboots, and then something breaks, audio stops working, the search bar freezes, the C: drive becomes inaccessible, or the system blue screens and rolls back automatically.
Knowing which stage you are in cuts your troubleshooting time in half. Use the decision chart below to orient yourself before jumping into any fixes.
→ Check pause state in Settings → Windows Update → Check if paused
→ Visit the Windows Release Health Dashboard for active safeguard holds
→ Check for MDM or Group Policy restrictions
→ Wait at least 2 hours — large updates can pause at fixed points
→ If still frozen: restart BITS and Windows Update services
→ Clear the SoftwareDistribution folder
→ Note the exact error code and look it up in the reference table below
→ Run DISM and SFC to repair system files
→ Check available disk space (minimum 20 GB required)
→ Go to Settings → System → Recovery → Go back (within 10 days)
→ Or boot into Windows Recovery Environment and uninstall the update
→ Check for driver conflicts using Device Manager
Understanding Windows 11 Update Error Codes
When an update fails, Windows gives you a hexadecimal error code. These codes are not random, each one points to a specific part of the system that is misbehaving. Here is what the most common ones actually mean, and what you should do about each one.
| Error Code | What It Means | What To Do |
|---|---|---|
| 0x80070002 | Missing or corrupted manifest files | Run DISM /RestoreHealth, clear update cache |
| 0x80070005 | Access denied — permission conflict | Reset service security descriptors via command line |
| 0x8007000d | Corrupt update archive or cache data | Delete SoftwareDistribution folder, retry update |
| 0x80070020 | File locked by another process (antivirus) | Run a clean boot, check CBS log, use Process Monitor |
| 0x80070422 | Windows Update service is disabled | Open Services, set Windows Update to Automatic and start it |
| 0x800f0922 | Not enough disk space or VPN blocking telemetry | Free at least 20 GB, disconnect VPN temporarily |
| 0xC1900101 | Driver incompatibility during upgrade | Run SetupDiag, update or uninstall the problematic driver |
| 0xC1900200 | Hardware does not meet Windows 11 requirements | Enable TPM 2.0 and Secure Boot in BIOS/UEFI settings |
| 0x8007042B | Setup closed by a background process | Perform a clean boot using msconfig before updating |
| 0x80073712 | Component Store corruption | Run DISM /RestoreHealth followed by SFC /scannow |
Tip: For a complete list of error codes and official explanations, refer to Microsoft’s Windows Update error reference on Microsoft Learn.
The “Least Destructive First” Repair Ladder
Think of Windows 11 update troubleshooting as a ladder. You always start at the bottom, the safest, easiest steps, and only climb higher if the problem persists. Skipping rungs wastes time and sometimes makes things worse.
")
Here is the order to follow, every single time:
- Resume updates if they are paused
- Restart your PC and check for updates again
- Free up at least 20 GB of disk space
- Run the built-in Windows Update Troubleshooter
- Restart the Windows Update and BITS services
- Repair system files with SFC and DISM
- Manually clear the update cache
- Perform a clean boot and retry
- Run SetupDiag for feature upgrade failures
- Use in-place repair with a Windows 11 ISO
- Roll back via Windows Recovery Environment
- Clean install as a last resort
Most problems are solved somewhere between steps 3 and 7. You rarely need to go further.
Fix 1: Check If Windows Update Is Paused or Policy-Blocked
This is the step almost everyone skips. Before doing anything technical, go to Settings → Windows Update and look for a pause banner at the top. If updates were paused manually (or by a management tool), that is your entire problem. Click Resume updates and check again.
")
Also check whether your device is under a safeguard hold. Microsoft regularly places temporary blocks on specific hardware or software configurations when a known issue has been identified. During a safeguard hold, Windows will not offer the blocked update, and this is intentional.
Forcing it through will not help. The correct action is to check the Windows Release Health Dashboard for your Windows version, look for active known issues, and wait for Microsoft to lift the hold.
If your PC is managed by an organization, a workplace laptop, a school device, or any machine with a domain account, group policy or Mobile Device Management (MDM) may be controlling your update settings. In that case, talk to your IT administrator before trying any advanced fixes.
Contrarian insight: Many users assume their PC is broken when Windows says it is up to date, but a newer build is available. In reality, Microsoft deliberately stages feature updates in waves. Your device may simply be in a later wave. This is not a failure, it is a feature.
Fix 2: Free Up Disk Space Before Doing Anything Else
You would be surprised how often low disk space is the silent culprit. Windows 11 needs at least 20 GB of free space for a standard quality update, and considerably more for a feature (version) upgrade. If your system drive is nearly full, the update will either fail mid-download or mid-install without a clear error.
To quickly check and clean up:
- Go to Settings → System → Storage → Cleanup recommendations
- Run Disk Cleanup as administrator and include system files
- Delete old Windows installation folders (Windows.old) if present
- Uninstall apps you no longer use
")
If your drive is genuinely full and you cannot free up enough space, you can temporarily connect an external USB drive, Windows Update can use it as an alternate staging cache during larger feature upgrades.
Fix 3: Run the Windows Update Troubleshooter
The built-in troubleshooter catches a surprising range of common issues, misconfigured services, stalled downloads, incorrect registry values, and fixes them automatically without requiring any technical knowledge.
To run it:
- Open Settings
- Go to System → Troubleshoot → Other troubleshooters
- Find Windows Update and click Run
- Wait for the scan to complete and apply any suggested fixes
- Restart your PC and check for updates again
")
If the troubleshooter finds and fixes something, great. If it says it found issues but could not fix them, or it shows “not fixed” next to a problem, note what it reports, that information is useful for the next steps.
Fix 4: Restart the Core Windows Update Services
Windows Update relies on several background services working in sync. If any of them crash or enter a stuck state, updates will stall silently. Restarting them takes about sixty seconds and often resolves frozen downloads or failed update checks.
Press Win + R, type services.msc, and press Enter. Find each of these services, right-click, and choose Restart (or Start if they are stopped):
- Windows Update (wuauserv)
- Background Intelligent Transfer Service (bits)
- Cryptographic Services (cryptsvc)
")
If you prefer using the command line, open Command Prompt as administrator and run:
net stop wuauserv
net stop bits
net stop cryptsvc
net start cryptsvc
net start bits
net start wuauserv
After restarting these services, go back to Settings → Windows Update and click Check for updates.
Fix 5: Repair System Files with SFC and DISM
If the Windows Component Store, the internal library of system files that updates depend on, has become corrupted, updates will fail at the installation stage. The System File Checker (SFC) and Deployment Image Servicing and Management (DISM) tool work as a pair to detect and repair that corruption.
Think of it this way: DISM connects to Microsoft’s servers to download clean, verified copies of any damaged components, and then SFC uses those repaired components to replace corrupted files on your system. Always run them in this order.
Open Command Prompt as administrator (right-click on the Start button, select “Terminal (Admin)”) and run these commands one at a time. Wait for each to complete fully before moving to the next.
DISM.exe /Online /Cleanup-Image /ScanHealth
DISM.exe /Online /Cleanup-Image /CheckHealth
DISM.exe /Online /Cleanup-Image /RestoreHealth
sfc /scannow
The DISM RestoreHealth step can take anywhere from 10 to 30 minutes, and may appear to hang at 20% for several minutes, this is normal. Do not cancel it. Once SFC finishes, it will report one of three outcomes: no violations found, files repaired successfully, or files found but unable to repair. If you see the third outcome, move on to the manual reset in the next section.
")
According to Microsoft’s official DISM documentation, the RestoreHealth command uses Windows Update as the repair source by default. If your update connection is broken, you can point DISM to a local Windows ISO instead using the /Source parameter.
Fix 6: Manually Reset the Windows Update Components
If automated tools have not resolved the problem, this is your most powerful software-level fix. It stops all update-related services, wipes the corrupted local update cache, re-registers the core update DLLs, resets network stack settings, and restarts everything fresh. This clears the vast majority of persistent update loops and metadata corruption issues.
")
Open Command Prompt as administrator and run each block of commands in sequence.
Step 1: Stop the update services
net stop bits
net stop wuauserv
net stop appidsvc
net stop cryptsvc
net stop msiserver
Step 2: Delete the corrupted cache folders
rmdir %systemroot%\SoftwareDistribution /S /Q
rmdir %systemroot%\system32\catroot2 /S /Q
Note: If you want a safety net, rename these folders instead of deleting them. Use ren %systemroot%\SoftwareDistribution SoftwareDistribution.bak and ren %systemroot%\system32\catroot2 catroot2.bak. This preserves the old data while forcing Windows to create fresh folders.
Step 3: Reset the network layers
netsh winsock reset
netsh winsock reset proxy
Step 4: Restart the services
net start bits
net start wuauserv
net start appidsvc
net start cryptsvc
net start msiserver
After running all four steps, restart your PC and then check for updates from Settings. Windows will rebuild the SoftwareDistribution folder from scratch and pull fresh metadata from Microsoft’s servers.
Fix 7: Perform a Clean Boot to Isolate Background Conflicts
Some update failures are not caused by corrupted Windows files at all, they are caused by a third-party application or security tool locking a file that the update needs to modify. Antivirus software, backup agents, and VPN clients are common culprits.
A clean boot strips Windows down to its essential services only, removing all third-party interference. Here is how to set it up:
- Press Win + R, type msconfig, and press Enter
- Under the Services tab, check Hide all Microsoft services, then click Disable all
- Switch to the Startup tab and click Open Task Manager
- In Task Manager, select each startup item and click Disable
- Close Task Manager, click OK in msconfig, and restart your PC
Tip: Before disabling startup items, use the Snipping Tool to take a screenshot of the list. This makes it much easier to re-enable everything after the update completes.
")
Once you are in the clean boot environment, try the update again. If it succeeds, one of your disabled apps was the culprit. Re-enable them one at a time to identify which one.
Fix 8: Addressing Feature Update Failures (Version Upgrades)
Feature upgrades, moving from Windows 11 22H2 to 23H2 to 24H2, for example, fail for different reasons than monthly quality updates. The most common cause is driver incompatibility, where an active driver crashes or interrupts memory mapping during the migration phase, causing the entire upgrade to roll back.
Using SetupDiag to find the cause
SetupDiag is a free Microsoft diagnostic tool that parses the setup logs created during a failed upgrade and identifies the exact file, driver, or component that caused the failure. According to Microsoft’s SetupDiag documentation, it matches failure signatures against a library of known issue rules and reports a specific result code.
To use it:
- Create a folder at C:\SetupDiag
- Download SetupDiag.exe from the Microsoft website and place it in that folder
- Right-click the file and select Run as administrator
- Open the generated SetupDiagResults.log file and look at the Failure Details section
")
The log will tell you exactly which driver or hardware component caused the block. From there, update or uninstall that driver, then retry the upgrade.
The 0xC1900101 error family
This entire family of error codes relates to driver failures during feature upgrades. If you see any variant of 0xC1900101, the upgrade is rolled back to protect system stability. Run SetupDiag first, then go to Device Manager and update or temporarily uninstall drivers flagged in the log, particularly display adapters, network adapters, and storage controllers.
")
Fixing Update Issues on Unsupported Devices (No TPM 2.0 or Secure Boot)
If you installed Windows 11 on an older PC that does not officially support it, you have probably seen a notification that says: “Your version of Windows 11 has reached end of service.” When you click through, it shows a contradictory message, “You’re up to date” followed by “Your device is missing important security updates.”
This happens because Microsoft has released security updates specifically tied to hardware security features, namely TPM 2.0 (Trusted Platform Module) and Secure Boot.
- TPM 2.0 is a physical chip that stores cryptographic keys and enables features like BitLocker encryption and Windows Hello
- Secure Boot is a UEFI firmware feature that verifies only trusted, signed software runs during startup
If your device lacks these features, those security-specific updates simply cannot install. Here is how to work through your options.
First, verify what your hardware actually supports:
Press Win + R, type tpm.msc, and press Enter. If the Specification Version shows 2.0, your TPM is present and active. If it shows 1.2 or “Compatible TPM cannot be found,” your device does not meet the requirement.
For Secure Boot, press Win + R, type msinfo32, and press Enter. Look for Secure Boot State — it should say On.
If either feature shows as disabled (rather than absent), go into your BIOS/UEFI settings by restarting and pressing your manufacturer’s key (often F2, Del, or F10 during startup). Navigate to the Security or Boot tab and enable both TPM and Secure Boot. After saving and restarting, your PC will be able to receive the updates it was previously blocking.
")
If your hardware genuinely does not support these features, you have three realistic options:
1 . Option 1: Do nothing and stay aware.
Your PC continues working normally. Other updates are still installed. The specific security updates tied to TPM and Secure Boot will not install, meaning if you encounter the security threats they protect against, your device is more vulnerable. This is a conscious trade-off, not an emergency.
2 . Option 2: Perform an in-place upgrade using Rufus.
This installs the latest Windows 11 build (including 24H2) while keeping all your apps, files, and settings intact. It removes the end-of-service notification and gets you on the latest build, even though it bypasses the hardware requirements. You will need a USB drive of at least 16 GB, the latest Windows 11 ISO downloaded from Microsoft, and the free Rufus tool.
When Rufus prompts you during creation, select the option to remove TPM 2.0 and Secure Boot requirements. During installation, choose Keep personal files and apps.
")
Important: This is not a permanent solution. The next feature update cycle will eventually face the same limitation. It buys you time, not a permanent fix.
3 . Option 3: Upgrade your hardware
For Intel, you need 8th generation or later. For AMD, you need the Ryzen 3000 series or later. This is the only path to full, uninterrupted Windows 11 support going forward.
Fix 9: Use Cloud Repair or In-Place Repair for Deep Corruption
If your Settings menu itself is broken, or if multiple fixes have failed and the system feels fundamentally unstable, it is time to bring in heavier tools.
Cloud Repair (Windows 11 22H2 and later)
On Windows 11 version 22H2 with the February 2024 update or later, go to:
Settings → System → Recovery → Fix problems using Windows Update → Reinstall now
")
This pulls a clean repair package from Microsoft’s servers that matches your exact build, replaces corrupted components, and preserves your files, apps, and settings. The PC restarts automatically about 15 minutes after completion.
Note that this option is unavailable on devices managed by enterprise policies or WSUS servers.
In-Place Repair with a Windows 11 ISO
This is the most reliable repair option available without doing a full wipe. Download the latest Windows 11 ISO from Microsoft, mount it by double-clicking, and run setup.exe. When prompted, choose Upgrade this PC now and select Keep personal files and apps. The installer will replace all system files with clean versions while leaving your data untouched.
")
This fixes virtually everything short of hardware failure or a fully unbootable system.
Recovering from Post-Update Boot Failures
Sometimes an update installs successfully, reboots, and then your PC cannot start Windows normally. This is one of the most stressful scenarios, but it is also one of the most recoverable.
Accessing Windows Recovery Environment (WinRE):
From a working desktop: Click the Power button in the Start menu, hold Shift, and click Restart.
If Windows cannot load at all: Turn on your PC and immediately hold the power button for 5–10 seconds to force a hard shutdown as soon as you see the Windows logo. Repeat this twice. On the third startup, Windows will automatically enter the recovery screen.
Important: If your device uses BitLocker encryption, have your BitLocker Recovery Key ready before entering recovery mode. You can find it at account.microsoft.com/devices/recoverykey.
Recovery options available in WinRE:
- Uninstall Updates: Removes the most recently installed quality or feature update, the fastest path back to a working system
- System Restore: Reverts to a restore point from before the update, preserving personal files
- Startup Repair: Automatically fixes common boot configuration issues
- Command Prompt: Gives you full command-line access to run DISM, chkdsk, or file corrections at a low level
- Reset This PC: Nuclear option, reinstalls Windows with optional file preservation
")
For most post-update boot failures, Uninstall Updates gets you back online within minutes. Start there before trying anything more drastic.
Common Mistakes That Make Update Problems Worse
")
This is where a lot of well-meaning troubleshooting goes sideways. Avoid these.
Running SFC and DISM before checking for safeguard holds
If Microsoft has deliberately blocked an update on your device due to a known bug, repairing your system files will not help. Check the Release Health Dashboard first.
Deleting the SoftwareDistribution folder while update services are still running
Always stop the Windows Update and BITS services before touching the SoftwareDistribution folder. Deleting files that an active service is using can cause additional corruption.
Forcing optional preview updates repeatedly
Preview builds (marked as optional) are beta releases. If they fail to install on your system, stop retrying. The fix will be included in the next stable monthly update. Forcing previews that conflict with your environment can create new problems.
Editing the registry without a backup
Registry edits occasionally appear in troubleshooting guides for specific update errors. If you do go down this path, always export the relevant key before making changes. One incorrect registry edit can prevent Windows from booting.
Skipping a PC restart between troubleshooting steps
Many fixes, SFC scans, service restarts, cache deletions, require a reboot to take full effect. If you run five fixes in a row without restarting between them, you have no idea which one worked or whether any of them took effect.
Using a VPN during updates
VPN connections can block Windows Update’s telemetry endpoints, trigger SOAP delivery failures (error 0x80244007), or cause signature validation mismatches. Disconnect your VPN before running updates, especially large feature upgrades.
Expert Tips for Home Users and IT Administrators
")
Verify downloaded update files with PowerShell
If you are installing updates manually from the Microsoft Update Catalog, always check the file hash before running the installer. A corrupted download can cause the exact failures you were trying to fix.
Get-FileHash -Path "C:\Updates\windows11.0-kb5083769-x64.msu" -Algorithm SHA256Compare the output against the hash listed on the Microsoft Update Catalog page. If they do not match, the file is corrupted and you need to re-download it.
For IT administrators managing enterprise fleets
Microsoft’s Known Issue Rollback (KIR) feature allows you to push a rollback of a problematic update to all managed devices via Group Policy without manually touching each machine. Monitoring the Windows Release Health Dashboard regularly, Microsoft’s servicing team is generally transparent about which updates have known issues and which devices are affected.
According to Microsoft’s enterprise update management documentation, combining WSUS with update rings lets you test updates on a pilot pool before wide deployment.
Use the Sysinternals Process Monitor for stubborn sharing violations
When an update fails with error 0x80070020 (file locked by another process), Sysinternals Process Monitor can capture exactly which application is holding the lock. Start a capture, reproduce the failure, stop the capture, and filter by the file path reported in the CBS log at %windir%\logs\cbs\cbs.log. The filtered results show you the exact process responsible.
Before vs. after using the manual reset approach
Before: Windows Update spins indefinitely at “Checking for updates,” download stalls at 40%, error 0x8007000d appears at installation, same loop repeats after every restart.
After: Services are cleanly restarted, fresh metadata is pulled from Microsoft’s servers, the update downloads completely, and installation completes without errors. The SoftwareDistribution folder starts from zero with no inherited corruption.
Wrapping Up: Fix the Problem, Not Just the Symptom
Windows 11 update failures are frustrating precisely because they seem random, but they almost never are. Every failure has a specific cause, and every cause has a targeted fix. The key is resisting the urge to run every tool at once and instead starting with the least destructive step that matches your actual symptom.
Check whether the update is even supposed to be available. Make sure you have enough disk space. Restart the services. Repair the system files. Clear the cache. If all else fails, use an ISO for an in-place repair. And if a recent update broke something, roll it back, you do not owe Microsoft a working system while they sort out their own regressions.
Keep this guide bookmarked. As Windows 11 continues to evolve and new issues emerge, the fundamental troubleshooting logic stays the same, start with diagnosis, follow the ladder, and always take the least destructive path first.
Frequently Asked Questions
Why does Windows 11 say I’m “up to date” when a newer version exists?
Microsoft rolls out feature updates in waves, not all at once. Your device may simply be in a later rollout wave. Additionally, if your device has a known compatibility issue, Microsoft may have placed a safeguard hold on it, which intentionally prevents the update from being offered until the issue is resolved. Check the Windows Release Health Dashboard for your version to see if a hold is active.
My update has been stuck at 27% (or 40%, or 100%) for two hours. Should I cancel it?
Not immediately. Large updates can appear frozen at specific percentages for extended periods while processing large files or applying component changes in the background. Wait at least two to three hours before considering a cancellation. If there is absolutely no disk activity (check Task Manager) after three hours, then a forced restart may be necessary — but do it only once, and let the recovery process run on next boot.
Is it safe to delete the SoftwareDistribution folder?
Yes, as long as you stop the Windows Update and BITS services first. The SoftwareDistribution folder is a local cache — Windows rebuilds it automatically the next time it checks for updates. Deleting it does not remove any installed updates or affect your system stability. If you want to be cautious, rename it with a .bak extension instead.
How do I uninstall an update that broke my PC?
If Windows is still bootable, go to Settings → Windows Update → Update history → Uninstall updates. If Windows cannot boot normally, restart into the Windows Recovery Environment (hold Shift while clicking Restart, or force two hard shutdowns). From the Advanced options menu, select Uninstall Updates and choose the most recent quality or feature update.
What is the difference between a quality update and a feature update?
Quality updates are the monthly security and reliability patches (the “Patch Tuesday” releases). They are smaller, faster to install, and roll back easily. Feature updates are the annual version upgrades — moving from 22H2 to 23H2, for example. They are much larger, take longer, require more disk space, and involve a full upgrade process that is more likely to encounter driver or compatibility conflicts.
Can my antivirus block Windows Update?
Yes. Some antivirus programs or endpoint security tools lock system files in real time, which can trigger error 0x80070020 (sharing violation). Temporarily disabling your antivirus or running a clean boot isolates whether this is the cause. If updates succeed in a clean boot environment, configure your security software to exclude Windows Update directories or add exceptions for the update process.
What should I do if DISM /RestoreHealth fails or cannot connect to Windows Update?
If DISM cannot reach Windows Update servers to download repair files (often due to a VPN, proxy, or network filtering), you can point it to a local source instead. Mount a Windows 11 ISO that matches your current version, and run: DISM /Online /Cleanup-Image /RestoreHealth /Source:wim:D:\Sources\install.wim:1 /LimitAccess (replace D: with the ISO drive letter). This uses the ISO as a local repair source without needing internet access.
Should I use the in-place repair or a clean install?
Always try in-place repair first. It replaces all system files with clean copies while keeping your apps, settings, and personal files completely intact. A clean install should only be used as a last resort when system corruption is so deep that in-place repair fails, or when you want a genuinely fresh start. Both methods require a Windows 11 ISO or installation media.


[…] Read the Full Article → […]
[…] Read the Full Article → […]