It’s 2 a.m. Your server is unresponsive. The GUI is frozen. Your manager is calling. All you have is a blinking terminal cursor, and the sinking feeling that you don’t know where to start.
Here’s the thing: that moment is avoidable. Not by memorizing hundreds of commands, but by understanding the right ones, in the right order, with the right safety habits built in from day one.
Linux powers over 90% of all cloud servers worldwide, runs every Android phone, and sits at the heart of modern DevOps, cybersecurity, and software development. Yet most “Linux cheat sheets” hand you a flat list of 40 commands with no context, no warnings, and no sense of how they actually fit together.
")
This guide is built differently. It organizes 101 commands into a six-stack learning roadmap, teaches you which ones are dangerous and why, shows you how to combine them into real workflows, and gives you the safety habits professionals took years to develop.
Whether you just opened your first terminal or you’re brushing up for a job interview, you’ll finish this guide knowing not just what to type, but what you’re actually doing.
Why Most Linux Cheat Sheets Actually Make You Worse at Linux
Here’s something most tutorial sites won’t tell you: the reason beginners struggle at the terminal isn’t that the commands are hard. It’s that the CLI overloads your brain in ways that flat command lists completely ignore.
")
A 2026 systematic review analyzing 87 usability studies confirmed that cognitive load is the primary driver of errors and performance degradation in interface-heavy environments. The command line forces you to recall exact syntax (not just recognize it), track invisible state (where am I? What user am I?), chain operations sequentially, and keep file paths in working memory, all at once.
That’s a heavy cognitive burden. And when you drop a new user into that environment with nothing but a list of 101 commands, you’re not teaching them Linux. You’re testing their short-term memory under pressure.
Here’s the contrarian insight most educators miss: the goal of command-line learning isn’t memorization. It’s building mental compression, the ability to see a task and immediately know which cluster of commands solves it.
That’s why this guide uses stacks instead of a flat list. Each stack is a cognitive unit. You internalize one at a time, then combine them naturally.
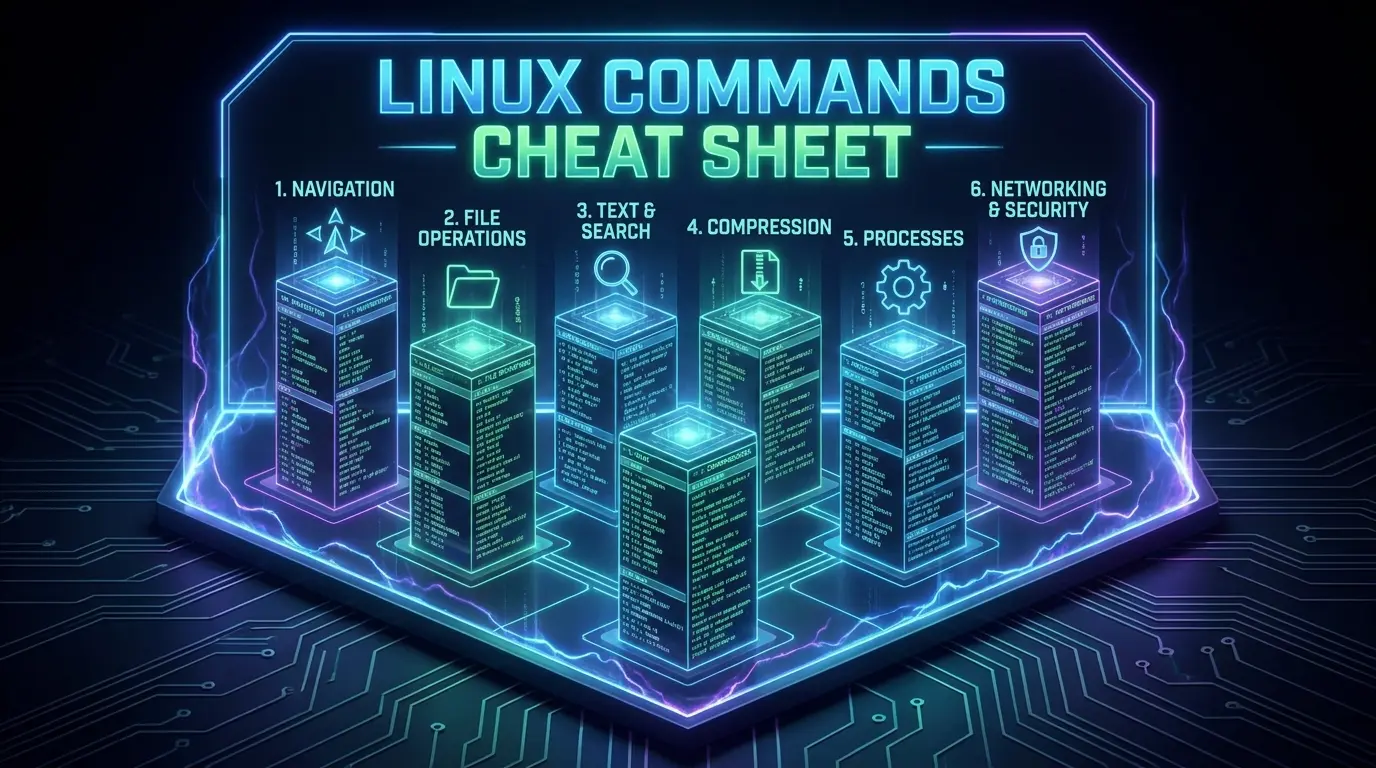
The 6-Stack Linux Command Roadmap
Think of these stacks as unlockable modules. You don’t need all 101 commands on day one. You need the right ones, in the right order, building on each other.
Stack 1: Navigation: Where Are You and How Do You Move?
Before you do anything in a Linux terminal, you need to know where you are and how to get somewhere else. This is the foundation everything else builds on. Fortunately, it’s also the simplest stack.
")
pwd: Print Working Directory
This is your first command. Every time. pwd tells you your current location in the filesystem.
$ pwd
/home/yourname
Never skip this. The number of disasters that started with someone running rm from the wrong directory is genuinely sobering.
ls: List Directory Contents
ls shows what’s inside your current directory. But on its own, it’s just a starting point.
$ ls           # basic list

$ ls -l        # detailed list with permissions, size, date

$ ls -a        # show hidden files (dot files)

$ ls -lah      # combine all three — long form, all files, human-readable sizes
That -lah combination is one you’ll use every single day. The -l flag reveals the full permission string, ownership, and modification timestamp of every file, all stored in the inode, the filesystem’s fundamental metadata structure described in the GNU Core Utilities documentation.
cd: Change Directory
$ cd /var/log         # go to an absolute path

$ cd Documents        # go to a relative path

$ cd ..               # go up one level

$ cd ~                # go home, from anywhere

$ cd -                # jump back to your previous directory
That cd – trick is one the videos taught and it’s genuinely useful. Toggle between two locations dozens of times a day without typing full paths.
tree: Visualize the Filesystem
$ tree -L 2           # show directory tree, two levels deep

$ tree -d             # directories only
tree is incredible for getting a bird’s-eye view of an unfamiliar project. Install it with your package manager if it’s not present by default.
Section Summary: Navigation commands are your spatial awareness toolkit. Start every session with pwd. Use ls -lah to see everything. Master cd variants to move fast. These three habits alone will prevent dozens of common mistakes.
Stack 2: File Operations: Create, Copy, Move, Delete
This is where things start to get real, and where the first real dangers appear. File operations interact directly with inode structures, and some of them are irreversible.
")
touch: Create Files and Update Timestamps
$ touch notes.txt          # creates an empty file

$ touch file1.txt file2.txt file3.txt   # create multiple files at once
Here’s something most beginner guides miss: touch is technically designed to update access and modification timestamps, not create files. Creating files is just a useful side effect. Build automation tools like make actually rely on those timestamps to determine what needs recompiling.
mkdir: Make Directories
$ mkdir projects                     # create one directory

$ mkdir -p work/2026/january         # create nested directories at once
Always use -p in scripts. Without it, mkdir throws an error if a parent directory doesn’t exist, a common source of script failures.
cp: Copy Files and Directories
$ cp file.txt backup.txt              # copy a file

$ cp -r myproject/ backup/           # copy a directory recursively

$ cp -a src/ dst/                    # archive mode — preserves permissions, timestamps, owner

$ cp -n file.txt destination/        # never overwrite existing files
That -n flag is underused and very valuable. When copying into shared directories, it prevents accidental overwrites.
mv: Move or Rename
$ mv old_name.txt new_name.txt       # rename a file

$ mv file.txt ~/Documents/           # move to another location

$ mv -i file.txt important_dir/      # ask before overwriting
mv is efficient because on the same filesystem it just updates the directory entry, no data copying happens. Cross-filesystem moves actually copy then delete.
rm: Remove Files (Handle With Care)
$ rm file.txt                        # delete one file

$ rm file1.txt file2.txt             # delete multiple files

$ rm -i file.txt                     # ask for confirmation first

$ rm -r directory/                   # delete a directory and everything in it
⚠️ rm -rf is one of the most dangerous commands in Linux. It bypasses all confirmation, recursively deletes everything in scope, and gives you no second chance. Always run ls or pwd before any rm -r operation. Consider using trash-cli as a safer alternative on personal machines.
ln: Create Links
$ ln -s /usr/bin/python3 python       # symbolic link

$ ln file.txt hardlink.txt            # hard link
Hard links point to the same inode as the original, two names for one file. Symbolic links are special files containing a path reference. Hard links can’t cross filesystems or point to directories. Symbolic links can, which is why they’re used for things like /etc/alternatives on Debian systems.
stat and file: Inspect Metadata and Type
$ stat notes.txt            # full inode details: permissions, timestamps, size

$ file document.pdf         # identify file type by its "magic number" header
file uses magic number inspection, not extensions, to identify what a file actually is. That .png that won’t open? file will tell you it’s actually a JPEG.
Section Summary: File operations follow a simple safety rule, preview before you act. Always ls before rm. Always pwd before mv. Use -i flags when you’re unsure. These habits take two seconds and save hours of recovery work.
Stack 3: Text and Search: Read, Filter, and Find Anything
Linux treats text as the universal interface. Configuration files, logs, scripts, data, it’s all text. This stack is where you learn to navigate that ocean.
")
cat, less, head, tail: Read Files
$ cat file.txt              # print entire file to terminal

$ less file.txt             # scroll interactively (q to quit)

$ head -n 20 file.txt       # show first 20 lines

$ tail -n 20 file.txt       # show last 20 lines

$ tail -f /var/log/syslog   # follow a live log in real time
tail -f is your best friend during deployments and debugging sessions. It watches a file for new content as it’s written. For large log files, never use cat, use less instead.
grep: Search for Patterns
$ grep "error" logfile.txt              # find lines containing "error"

$ grep -i "error" file.txt             # case-insensitive

$ grep -r "TODO" ~/projects/           # search recursively through directories

$ grep -n "pattern" file.txt           # show matching line numbers

$ grep -v "debug" logfile.txt          # show lines that DON'T match

$ grep -C 3 "error" logfile.txt        # show 3 lines of context around each match
grep with the pipe operator (|) is where real power emerges. The pipe takes the output of one command and feeds it as input to the next. For example:
$ ps aux | grep nginxThis lists all running processes and immediately filters for nginx. That two-command chain is one of the most common patterns in all of Linux administration.
awk: Process Structured Text
$ awk '{print $1, $7}' access.log               # print columns 1 and 7

$ awk -F: '{print $1}' /etc/passwd              # use colon as delimiter, print first field

$ awk 'NR>1 {print $2, $3}' employees.csv       # skip header row, print columns 2 and 3
While grep filters by pattern, awk processes by structure. It treats each line as a set of fields. It’s the right tool for anything column-based: logs, CSV files, system outputs.
sed: Stream Editor
$ sed 's/old/new/g' file.txt               # replace all occurrences

$ sed -n '2,4p' file.txt                   # print only lines 2 through 4

$ sed -i 's/localhost/0.0.0.0/g' app.conf  # edit file in place
sed -i (in-place editing) is powerful but risky. Always test your sed expression without -i first. Verify the output is what you expect, then add -i to apply the change.
find: Locate Files by Criteria
$ find . -name "*.txt"                         # find all .txt files from here

$ find /home -type f -size +100M              # files over 100MB

$ find /var/log -mtime -3 -name "*.log"       # .log files modified in last 3 days

$ find /tmp -empty -delete                    # find and delete empty files
find is the precision search tool. Unlike locate (which uses a pre-built database), find scans the actual filesystem in real time. For the official specification, the POSIX standard for the find utility is the authoritative reference.
sort, uniq, wc, cut, tr: Text Processing Utilities
$ sort names.txt                    # alphabetical sort

$ sort -nr numbers.txt              # numeric reverse sort

$ sort file.txt | uniq              # remove duplicate lines

$ uniq -c sorted.txt                # count occurrences of each line

$ wc -l file.txt                    # count lines

$ cut -d',' -f2 data.csv            # extract second column from CSV

$ tr 'a-z' 'A-Z'                    # translate lowercase to uppercase
The combination of sort | uniq -c | sort -nr is a classic log analysis pattern. It counts how often each line appears, then sorts by frequency. Used constantly for finding top IP addresses, error codes, or any repeated pattern.
Section Summary: The text processing stack is where Linux becomes genuinely powerful. grep filters, awk structures, sed transforms, and find locates. Combine them with pipes and you’ve built a flexible data analysis tool without writing a single line of code.
Stack 4: Compression and Archives: Pack, Ship, and Unpack
Data portability is built around tar and compression algorithms. You’ll use these constantly, for backups, software distribution, and transferring files between systems.
")
tar: Tape Archive
$ tar -czf archive.tar.gz directory/       # create compressed archive

$ tar -tzf archive.tar.gz                 # inspect contents without extracting

$ tar -xzf archive.tar.gz                 # extract archive

$ tar -xzf archive.tar.gz -C /tmp/        # extract to specific location
The flags break down simply: -c creates, -x extracts, -z enables gzip compression, -f specifies the filename. Always use -t to inspect an archive before extracting, you want to know what you’re unpacking into your current directory.
gzip, gunzip, zip, unzip
$ gzip file.txt                 # compress (replaces original with .gz)

$ gunzip file.txt.gz            # decompress

$ zip -r project.zip folder/   # create ZIP (cross-platform)

$ unzip project.zip            # extract ZIP
Use tar + gzip (.tar.gz) for Linux-to-Linux transfers, it preserves file permissions and metadata. Use zip when the destination might be Windows, which doesn’t understand tarball permission metadata.
Section Summary: Always inspect before extracting (tar -t). Use .tar.gz for Linux-native workflows, .zip for cross-platform. The -C flag lets you control exactly where files land during extraction.
Stack 5: Processes and System Monitoring: What Is Your System Actually Doing?
This stack is where you go when something seems wrong. These commands reveal the state of your system, what’s running, what’s consuming resources, and what’s failing.
")
ps: Process Snapshot
$ ps aux                              # show all running processes

$ ps aux | grep nginx                 # filter for a specific process

$ ps aux --sort=-%cpu | head -n 10   # top CPU consumers
ps aux gives you a static snapshot, PID, CPU percentage, memory usage, the command that spawned each process. The kernel exposes this data through the /proc virtual filesystem.
top and htop: Real-Time Monitoring
$ top                   # built-in real-time process monitor

$ htop                  # enhanced version with color and mouse support
top is available on virtually every Linux system by default. htop is almost always worth installing, it provides visual CPU and memory bars, easier process killing, and much better readability, htop “does exactly the same thing as top but does it a little bit better and looks better while doing it.”
kill, killall, pkill: Terminate Processes
$ kill 1234                  # send SIGTERM (graceful shutdown) to PID 1234

$ kill -9 1234               # send SIGKILL (force terminate) — no cleanup

$ killall firefox            # kill all processes named firefox

$ pkill -f myapp             # kill by pattern match
SIGTERM (signal 15) asks a process to shut down gracefully, save state, close file descriptors. SIGKILL (signal 9) tells the kernel to terminate immediately, bypassing the process entirely. Always try SIGTERM first.
free, df, du: Resource Usage
$ free -h                       # memory usage (human-readable)

$ df -h                         # disk space per mounted filesystem

$ du -sh /var/log               # total size of a directory

$ du -h --max-depth=1 /home    # size of each subdirectory in /home
df -h tells you how full your filesystems are. du -sh tells you who’s filling them. Together they’re the first commands to run when a server reports “disk full” alerts.
uptime, uname, hostname: System Identity
$ uptime                   # how long the system has been running, load averages

$ uname -a                 # kernel version, architecture, hostname

$ hostname                 # current system hostname
journalctl and dmesg: Logs
$ journalctl -xe                     # recent system log entries with errors

$ journalctl -u nginx -n 50          # last 50 log lines for nginx service

$ journalctl -f                      # follow live log output

$ dmesg | tail -n 30                 # recent kernel messages (hardware, drivers)
journalctl is the modern log tool for systemd-based distributions, which covers essentially every major distro in 2026. dmesg gives you raw kernel ring buffer output, which is invaluable for diagnosing hardware issues or driver failures at boot.
Section Summary: The monitoring stack answers the question “what is my system doing right now?” Learn ps aux, top, df -h, and journalctl -xe first. They cover 80% of real-world troubleshooting scenarios.
Stack 6: Networking and Security: Connect, Secure, and Control Access
This is the most advanced stack, but also the one where outdated knowledge causes the most problems. Many tutorials still teach deprecated tools. Here’s the modern standard.
")
ip: Modern Network Configuration
$ ip a                      # show all IP addresses

$ ip link                   # show network interfaces

$ ip r                      # show routing table

$ ip n                      # show neighbor (ARP) table
ip replaces ifconfig, route, and arp. According to the iproute2 documentation, the old net-tools suite has been unmaintained for years and is absent from many modern distributions by default.
ss: Socket Statistics
$ ss -tuln              # show all listening TCP and UDP ports

$ ss -ltp               # listening TCP sockets with process names

$ ss -s                 # summary statistics
ss replaces netstat. It’s faster, richer, and actively maintained. The information is otherwise similar, open connections, listening ports, socket states.
The comparison between legacy and modern networking tools is one of the most important things to understand before you start using other people’s Linux tutorials. If a guide shows ifconfig, it’s probably outdated.
| Task | ⚠️ Legacy (Deprecated) | ✅ Modern Standard | Why Switch? |
|---|---|---|---|
| Show interfaces | ifconfig | ip link | Supports modern features, actively maintained |
| Show IP addresses | ifconfig | ip a | Handles multiple IPs and IPv6 correctly |
| Routing table | route | ip r | Supports policy routing and multiple tables |
| ARP neighbors | arp | ip n | Unified ARP/NDP, shows neighbor states |
| Open sockets/ports | netstat | ss | Faster, richer filtering, actively maintained |
| Wireless config | iwconfig | iw | Modern wireless stack support |
ping, traceroute, dig, curl: Connectivity Testing
$ ping -c 4 google.com              # send 4 ICMP packets, check reachability

$ traceroute google.com             # map the network path, hop by hop

$ dig example.com                  # detailed DNS query

$ curl -I https://example.com      # fetch HTTP headers only

$ wget https://example.com/file.zip  # download a file non-interactively
ssh: Secure Shell
$ ssh user@192.168.1.10                    # connect to remote host

$ ssh -i ~/.ssh/mykey.pem user@server      # connect using a specific key
ssh is how you access remote systems securely. It encrypts everything. Its predecessor, telnet, sent passwords in plain text, never using it. For large file transfers between systems, rsync is the professional standard because it only transmits changed portions of files, dramatically reducing bandwidth usage for repeated syncs.
$ scp file.txt user@remote:/path/           # copy one file over SSH

$ rsync -avh ~/docs/ user@server:/backups/  # sync directory, verbose, human-readable
chmod and chown: Permissions and Ownership
Linux implements a Discretionary Access Control model where every file has an owner, a group, and three permission tiers. Each tier, owner, group, others, gets independent read (r), write (w), and execute (x) bits. The Linux Filesystem Hierarchy Standard governs how these are applied across the directory tree.
$ chmod 755 script.sh            # owner: rwx, group: rx, others: rx

$ chmod u=rw,g=r,o= file.txt    # symbolic mode — more readable

$ chown alice:developers file.txt   # change owner and group

$ chown -R alice ~/projects/     # recursive ownership change
sudo: Privilege Escalation
$ sudo apt update               # run one command with admin privileges

$ sudo -i                       # open root shell (use sparingly)

$ sudo -l                       # list what you're allowed to run
Modern best practice keeps root access through sudo rather than logging in as root directly. This creates an audit trail in system logs and limits the blast radius of mistakes.
Package Managers: Install, Update, Remove
# Debian/Ubuntu

$ sudo apt update && sudo apt upgrade

$ sudo apt install nginx

$ sudo apt remove nginx

# Fedora/RHEL

$ sudo dnf install httpd

# Arch Linux

$ sudo pacman -Syu
Section Summary: Use ip and ss, not ifconfig and netstat. Use ssh for all remote access. Use chmodwith symbolic mode for clarity. And use sudo deliberately, not habitually.
The Danger Zone: Commands That Can Break Everything
Most cheat sheets skip this. They shouldn’t. Some Linux commands have a blast radius that extends well beyond the file you thought you were targeting.
The single most dangerous command a beginner can run is: sudo rm -rf /
Don’t run it. It attempts to recursively delete the entire root filesystem. Modern Linux distributions include a –preserve-root safeguard, but some environments disable it. The pattern rm -rf $VARIABLE/ is similarly dangerous, if the variable is empty or expands unexpectedly, the / at the end becomes the target.
Safer deletion pattern:
# Don't do this blindly:

rm -rf /tmp/mydir

# Do this instead:

pwd                          # confirm where you are

ls -la /tmp/mydir            # confirm what's inside

rm -rf /tmp/mydir            # now proceed with confidence
Common Mistakes and How to Avoid Them
Mistake 1: Not checking your current directory before destructive commands
Always run pwd and ls before rm -r, mv, or cp -r. Two seconds of verification prevents hours of recovery.
Mistake 2: Copying commands from forums without reading them
A command you don’t understand is a command you can’t trust. Use man command or command –help before running anything unfamiliar. Research from the scientific review notes that “supply-chain fragility” from copy-paste culture is a real operational risk.
Mistake 3: Running everything as root
If you find yourself prefixing every command with sudo, something is misconfigured. Use sudo for specific privileged operations, not as a default mode of operation.
Mistake 4: Using chmod 777 as a fix
Setting world-writable permissions (chmod 777) breaks the security model. If a web app can’t access a file, the correct fix is proper group membership and targeted permissions, not giving every user on the system full control.
Mistake 5: Confusing legacy and modern networking tools
If your networking commands aren’t working, you might be using ifconfig on a system where only ip is installed. Default to ip and ss everywhere.
Mistake 6: Assuming pipe commands always succeed
Use set -euo pipefail at the top of any bash script. Without it, a failed command in a pipeline silently continues, potentially propagating bad data through the rest of your script.
Real-World Workflows: Combining Commands That Matter
Workflow 1: Diagnose a Slow Server
This is the 10-command triage sequence every Linux admin should have memorized:
$ uptime                             # how long running, load averages

$ free -h                            # is RAM exhausted?

$ df -h                              # is disk full?

$ du -sh /var/log                    # is something filling the log directory?

$ ps aux --sort=-%cpu | head -n 10    # what's consuming CPU?

$ ps aux --sort=-%mem | head -n 10    # what's consuming memory?

$ ss -tuln                             # what ports are listening?

$ journalctl -xe                       # any recent errors?

$ tail -f /var/log/nginx/access.log   # watch live traffic

$ dmesg | tail -n 20                   # any hardware issues?
Workflow 2: Backup a Directory and Transfer It
$ cd /opt

$ tar -czf /tmp/app-backup-$(date +%Y%m%d).tar.gz myapp/

$ tar -tzf /tmp/app-backup-*.tar.gz | head     # verify contents

$ rsync -avh /tmp/app-backup-*.tar.gz user@backup-server:/backups/
Before (without this workflow): Manually copying files, no compression, no verification, no audit trail.
After: One repeatable sequence, date-stamped archive, contents verified before transfer.
Workflow 3: Search Logs for Errors by Frequency
$ grep "ERROR" /var/log/app.log | awk '{print $5}' | sort | uniq -c | sort -nr | head -20This chain: filters for errors → extracts the error code field → sorts → deduplicates with counts → re-sorts by frequency → shows top 20. Five commands that replace what would take many lines in most programming languages.
Expert Tips You Won’t Find in Generic Cheat Sheets
Tip 1: Use && and || for safe command sequences
$ cd /var/backups && tar -czf backup.tgz app/ && echo "Backup complete."The && operator only runs the next command if the previous one succeeded. If cd fails, tar never runs. This prevents the classic disaster where a backup archive overwrites itself because the cd silently failed.
Tip 2: Use tee when you need to log and display simultaneously
$ sudo apt upgrade | tee upgrade-log.txttee splits the output stream, one copy goes to your terminal, one goes to the file. You see progress live and keep a complete log automatically.
Use alias strategically but document your aliases.
Researchers who analyzed 2.2 million shell aliases from GitHub repositories found three dominant patterns: shortcuts, default overrides, and workflow chains. Aliases boost your personal productivity.
But undocumented aliases in shared environments create confusion during incident response and team rotation. Keep a commented alias file committed to your dotfiles repository.
Tip 4: Use man before you Google.
The built-in manual is authoritative, always available offline, and covers every flag. man -k keyword searches across all man pages for a topic. tldr command (from the tldr-pages project) gives community-maintained quick-start examples when man pages feel overwhelming.
Tip 5: The watch command is your real-time dashboard.
$ watch -n 2 'df -h && echo "---" && free -h'watch re-runs a command at a set interval, keeping your terminal updated. Use it while running disk-intensive operations to monitor space in real time.
The Future of the Linux Command Line
The command line is evolving faster than at any point in the last two decades.
AI-assisted shell interfaces are already appearing, systems that translate plain English into bash commands. Early research found that LLM-assisted CLI fuzzing discovered 51 zero-day vulnerabilities, suggesting that AI can exercise the command line in ways humans rarely attempt.
But this same capability introduces new risks: automation bias (trusting generated commands without understanding them), hallucinated flags, and dangerous recursive operations executed without verification.
The contrarian insight from the research is sobering: AI may widen, not reduce, the gap between novice and expert operators. Experts will leverage AI safely because they can verify and interpret the output.
Novices may execute advanced operations without internalizing the system models required to detect when something is wrong. The command you don’t understand is the command you can’t debug.
Natural-language interfaces are coming. The fundamentals described in this guide, mental models, state awareness, failure recovery, safe defaults, will matter more, not less, as that happens.
Conclusion: The Cheat Sheet Mindset
The most important thing this guide tried to give you isn’t a list of commands. It’s a way of thinking at the terminal, organized, safety-first, and task-oriented.
Here’s the mindset shift that separates beginners from professionals: experts don’t memorize commands. They internalize patterns. They know what cluster of tools solves what category of problem.
They preview before they act. They verify what happened after. And when something breaks, because it always does eventually, they know how to read the signals and recover.
Start with Stack 1. Move to Stack 2. Build workflows before you build scripts. Add one command to your muscle memory per day, applied to something real. Over time your own collection of patterns becomes your actual cheat sheet, one built from real experience, not someone else’s flat list.
The terminal rewards calm, deliberate work. Be the person who types pwd before rm. Be the person who reads man sed before running sed -i. That habit, more than any individual command, is what separates the engineers who get paged at 2 a.m. and solve things quickly, from the ones who make the situation worse.
All commands verified for standard GNU/Linux environments. Always test in a non-production environment before applying to critical systems. Consult your distribution’s official documentation for package-specific behavior.
Start with this guide. Add your own patterns. Update regularly. Over time, your cheat sheet becomes your calm voice at 2 a.m., and the difference between panic and control.